Monday 30 October 2017

DIY Disgust Costume – Inside Out

Catch the full details on this no-sew DIY Disgust costume inspired by Disney-Pixar’s Inside Out. Perfect for cosplay or Halloween!

I’ve been meaning to share this DIY costume with you guys since last year!

DIY Disgust Costume Inside Out Cosplay Halloween

For those of you who remember me going all out in 2015 on my Katy Perry costume, you already know that I freaking LOVE Halloween. And perhaps more than the holiday itself really, I freaking LOVE the challenge of making my own costumes and have often come up with them last-minute. So when my friends asked me in 2016 to do a group costume inspired by Disney-Pixar’s Inside Out where each of us would dress up as one of the emotions (Joy, Anger, Disgust, Fear, and Sadness), we had tons of fun bringing them all to life!

Inside Out cosplay - Fear Disgust Sadness

As you can see, we really got into taking our own spins on each one, but I tried to be as true to the original character as possible. It was just as much fun to act in character all night… with finding all the drinks, food, and other people’s costumes totally subpar to my expectations (it was all in good fun though, of course).

I mean, ew… you dressed like that??? How gross.

disgust inside out - cosplay halloween costume

Putting it together really wasn’t that difficult at all. I found most of my supplies and makeup in inexpensive places and, thanks to my Prime membership, was able to get everything shipped to me just a few days before my friend’s Halloween party. I’ve listed out the individual details of each component of my costume below, but I also have affiliate links for you to track similar items online if you wish to bookmark this post (since I basically sourced most of it in person with a limited timeline, and that kind of limits your options — so if you plan to do this costume in the future you’ll have ample opportunity to order these things).

My DIY Disgust Costume from Top to Bottom:


Dress:

  • green sleeveless dress from Target / similar
  • for the fabric design of the lime green and dark teal splat-like shapes, I used similarly colored puffy paints and just let them dry; all of it was hand-drawn and free-form, which let me put lots of extra sparkle into the dress
  • Notes: finding a dress like this during fall is especially tough (and can be pricey if you have to rush shipping), so your best bet is to just keep your eyes peeled during the summer!

Hair:

Scarf:

  • just a simple fuschia glittery tulle ribbon, tied into a knot and the ends trimmed so they came to a point
  • Notes: it’s a bit scratchy, but it was exactly the color I was looking for

Belt:

  • I made the belt myself with some extra-wide lime green grosgrain ribbon and a “D” chipboard letter readily available at any craft store (it was actually covered in burlap, but I painted it green and then covered it in glitter).

Tights:

  • dark green leggings, cut/hiked up to capri length / similar
  • Notes: I could only find a lighter green that nearly matched my dress, and the color in the character’s tights looks a good bit darker, so I actually sprayed the leggings in my garage with a dark green spray paint I already had (spray paint surprisingly performs decently on fabric when you don’t expect it to be perfect, and if it’s one-time use no one’s really looking all that hard… I’ve used it a number of times for costumes in a pinch!)

Shoes:

  • purpley-pink ballet flats / similar
  • Notes: I bought a really cheap red pair from Walmart and used a VERY light spray of white spray paint to make it look more pinkish (since it’s notoriously hard to cover over red anything, I expected the white would not do full coverage and I was right)… to make it more purpley, I used a spray pink dye I found at the craft store

Makeup:

  • purpley-pink lipstick stain, blush, and eyeshadow / similar
  • kelly green eyeshadow for my eyebrows and other shading accents / similar
  • Notes: When it comes to getting makeup to be really matchy-matchy for a costume, my usual trick is to look for a lipstick or lipstick stain that I then use for my eyes and blush; as long as you use a good primer and set with a crapload of translucent powder or fixing spray, it stays put long enough for your evening plans… and the better part is that you don’t spend a lot of money on buying separate lipstick, eyeshadow, and blush that you’ll use only once

Eyelashes:

The majority of questions I get on this costume is how I made the very dramatic green eyelash extensions. And this is where I get all proud like I solved a Rubik’s cube (even though this was significantly less frustrating).

  • You’ll need green card stock, Mod Podge, extra fine green glitter, eyelash glue, and false eyelashes
  • Notes: Honestly, I hate falsies and hate the feeling of something on my eye, so I set a goal to make this as least-irritating as possible, especially since putting anything with traditional glitter near your eye can be irritating and scratchy (so use extra caution when putting this together). First, I cut out an extra-long teardrop shape for each individual lash, then glued them together in clumps of three for each side. The benefit of card stock is that it can hold its shape a little better than normal paper, so I added a little glitter on both sides of the paper with Mod Podge — leaving the end that would go on my skin glitter-free — and then shaped them into a sort of curved shape so that they would  bow outward from my face (which ultimately led to less annoyed picking at them later from them getting tangled with my real lashes). I put on falsies with thick black eyeliner with eyelash glue, but I used the same glue to then paste the cardstock near the corners of my eye. This proved far easier and less heavy for my eyelids than trying to glue them to the falsies (which was my original plan until I realized this would work better).

And there ya have it!

DIY Inside Out costumes Fear and Disgust

As I mentioned, I kind of meant to share this DIY with you guys a long time ago… as it happened all the way back in 2016. I also did a second costume last year when I dressed up as Sia for my run club’s Halloween run, but that was just plain funny since I really only needed the wig and some red lipstick, and the rest was my normal black running attire. I had to run without the wig because it was impossible to see wearing it!

Sia running costume

Next up: I want to share this year’s DIY costume with you too, but that’s long enough for one post and I’ll have that tutorial for you I hope tomorrow… just under the wire. ;)

Happy Halloween, and happy DIYing!

Grab Your Supplies for This Costume:


You'll Also Love

Great Last-Minute Homemade Costumes
Clever Homemade Halloween Costumes
Halloween Prep
Trick-or-Treating at the UDH

The post DIY Disgust Costume – Inside Out appeared first on The Ugly Duckling House.

Website // Subscribe // Advertise // Twitter // Facebook // Google+


from The Ugly Duckling House https://www.uglyducklinghouse.com/diy-disgust-costume-inside/

Friday 27 October 2017

Anatomical Brain Cross Stitch Pattern

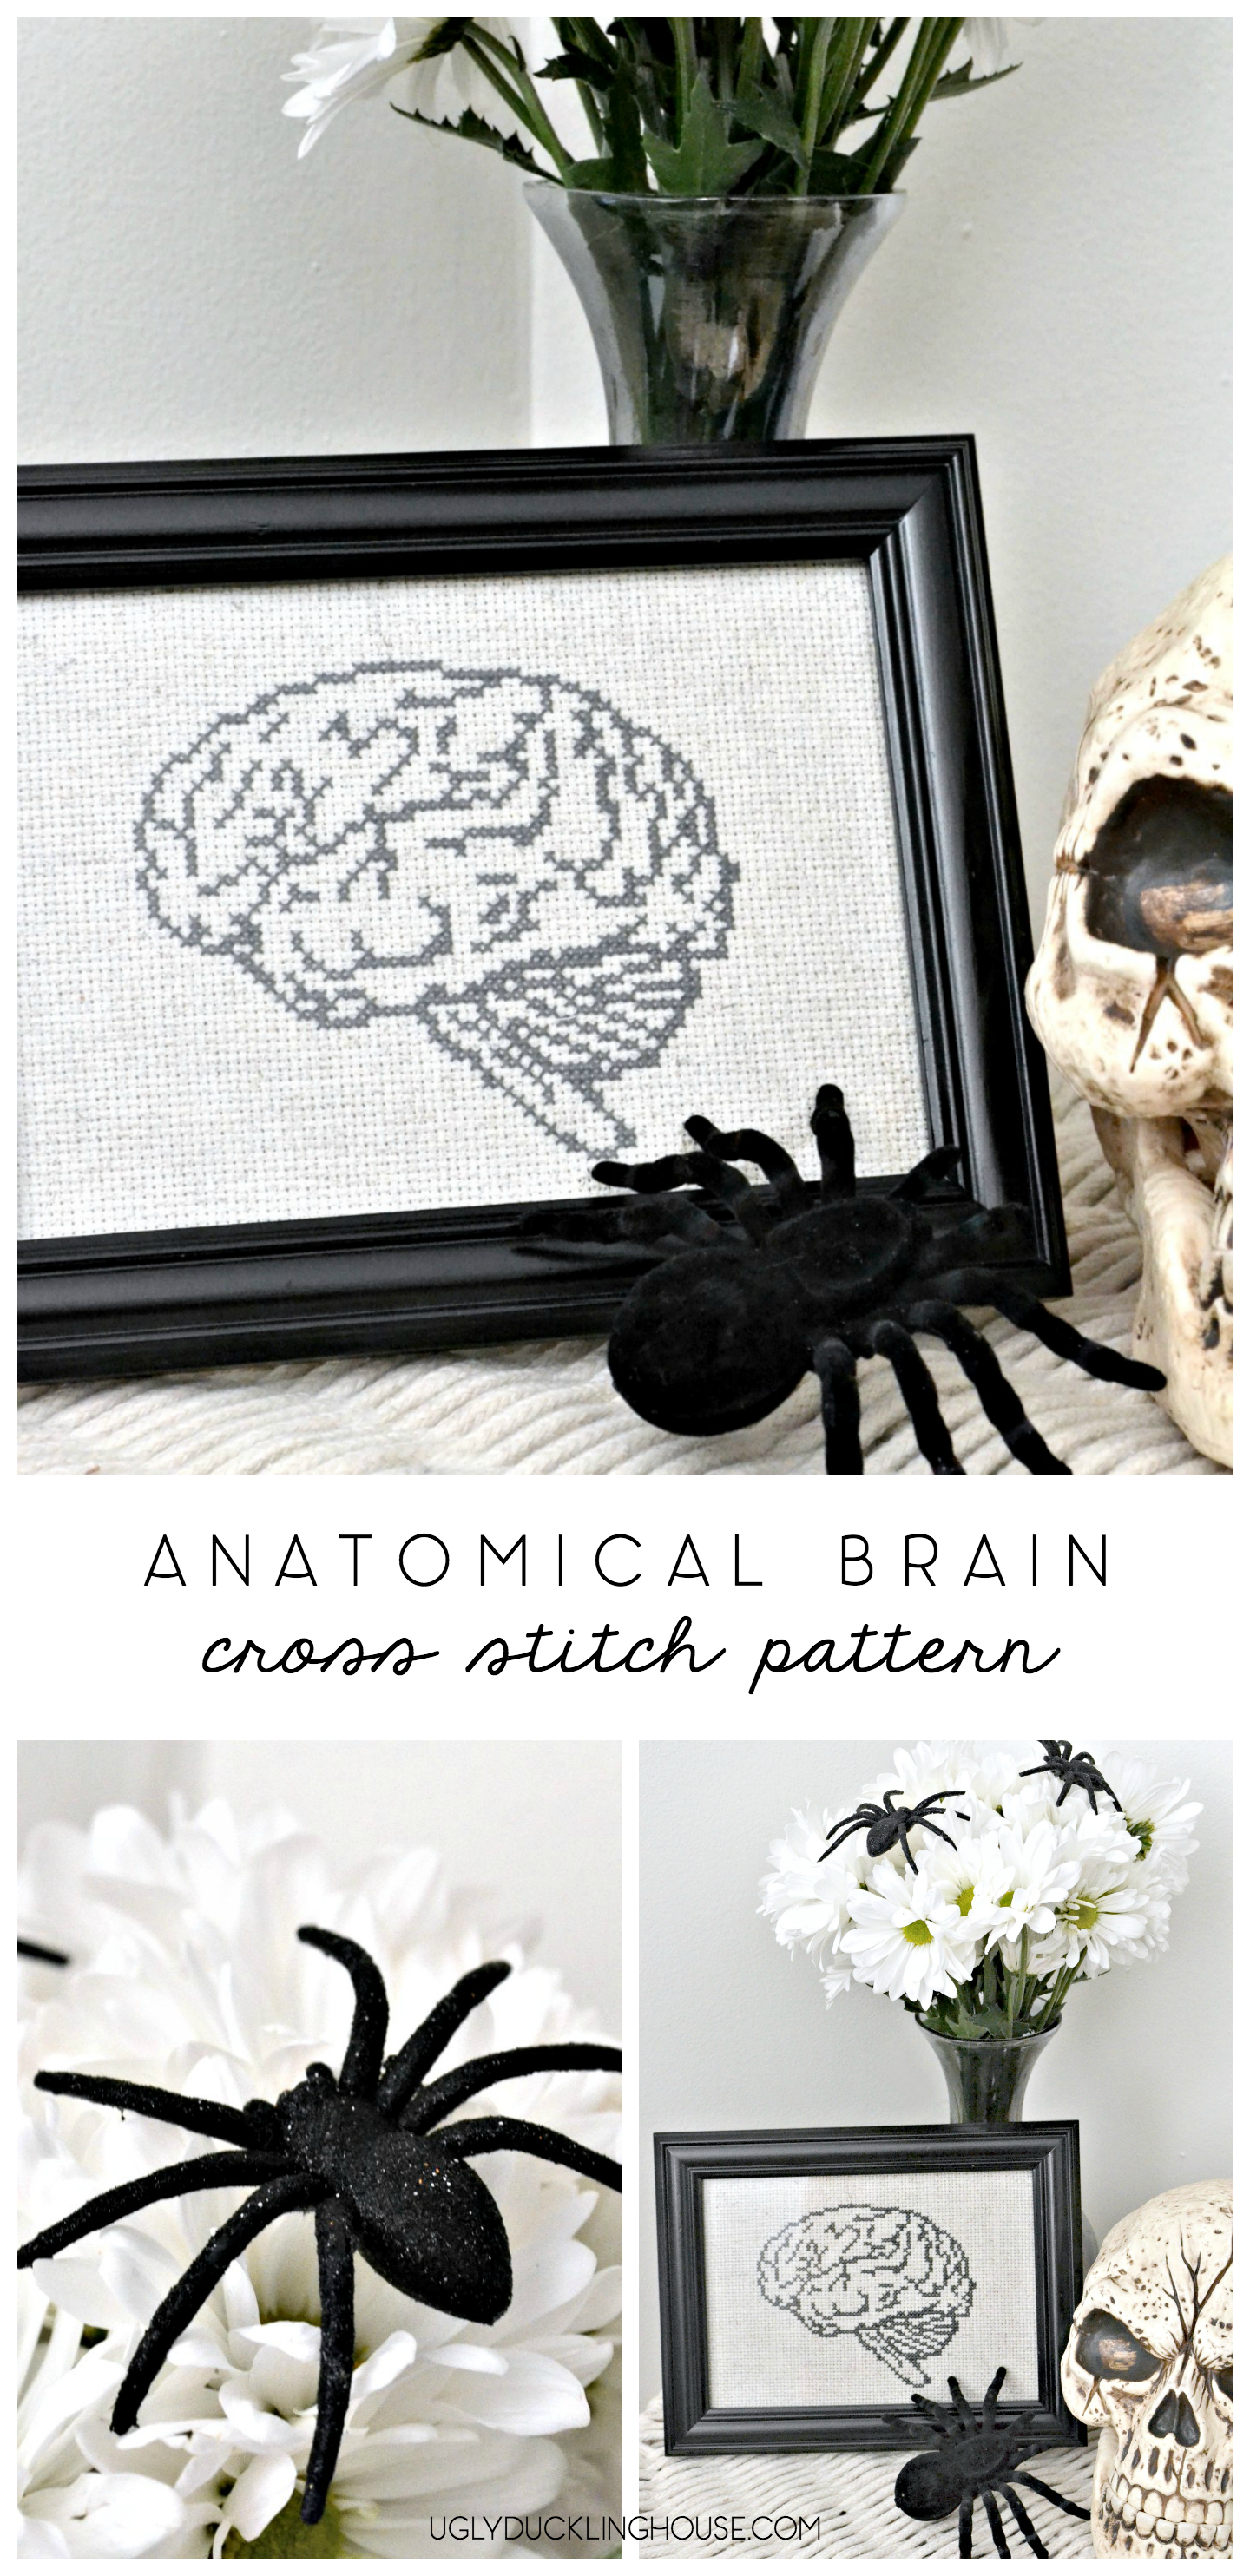
Tips on how I quickly frame cross stitch into a traditional picture frame, plus my anatomical brain cross stitch pattern, perfect for spooky Halloween decor.

As promised! It may have taken me ALL week to finally get the time to put this up for ya (my post about my costumes from last year is also forthcoming), but since it’s almost Halloween and the last cross stitch post was such a hit with some of you guys, I thought I’d give out a spooky-themed one, too:

brain cross stitch

In truth: I completed the pattern ages ago (just because I thought an anatomical ANYthing cross stitch would be cool to add to a gallery wall… whenever I put that up) and just kind of forgot about it. After rummaging through my cross stitch supplies though, I found it again and realized that if you use your imagination a little (say, for a spooky apothecary or mad scientist theme), it would feel right at home in your Halloween decor.

anatomical brain cross stitch pattern - halloween decor

It also wasn’t until I realized I wanted to share it here that I finally put it into a frame too, so I have instructions for you on that:

How I (Quickly and Lazily) Frame Cross Stitch Patterns

Another confession: I did this entire framing job (hehe, that makes me think of a heist) while sitting around someone else’s house last weekend (aka, while Charlie was watching cows and K was convincing me to take on his camper renovation project). It’s that easy!

First, I did a quick ironing on the back to help flatten out any of the areas that showed a “bump” from the cross stitch hoop.

flip cross stitch onto the back

Then, I did a loose measurement around the cardboard I was going to use for the backing (note: it’s best to do this with the acid-free stuff that comes with better quality photo frames — that leads to less fading and exposure over time).

cardboard and cross stitch fabric

Next, I clipped off the corners (in hindsight though, it would be better to cut it along the dotted lines as more of a triangular cut instead of the square I did… I later wound up clipping off more, as you’ll see in the next photos).

cut lines along fabric

Then, I grabbed some spare cross stitch thread and just started stitching along the back to connect the extra fabric around the back of the cardboard. This helps to pull the fabric taught and fits it snugly inside the frame.

wrap fabric around back of cardboard

finish stitching the back

Pop it in the frame, and done!

anatomical brain - cross stitch pattern

spiders on flower bouquet

Anatomical Brain Cross Stitch Pattern Download

And of course, the pattern! Last time, I assumed I might only share a cross stitch pattern once, but given that so many of you liked the last one, I’ve decided to add a new page to the blog: the Cross Stitch Patterns Library.

cross stitch library click here

I’ve been meaning to do something like this for the woodworking projects I’ve done, and this served as a great way to figure out how to create a library right from the start. This means that those of you who have already subscribed don’t have to go through a multi-step confirmation again; just add your email address as your access (last time I wasn’t sure how to best combine that with existing subscribers, so I hope this works much better). This will also give you access to download the existing fall tree cross stitch pattern if you didn’t do that last time, and any future patterns I post about will be there too (once they go live).

anatomical brain cross stitch

That’s it for now: I’ve gotta run and find a few accessories for this year’s Halloween costume for a party tomorrow night (if all goes well with my makeup, it will be an AWESOME costume to share, especially since it’s so last-minute!). Happy stitching!

anatomical brain cross stitch pattern - halloween decor

The post Anatomical Brain Cross Stitch Pattern appeared first on The Ugly Duckling House.

Website // Subscribe // Advertise // Twitter // Facebook // Google+


from The Ugly Duckling House https://www.uglyducklinghouse.com/anatomical-brain-cross-stitch-pattern/

Wednesday 25 October 2017

Spiked Hot Chocolate with Bourbon and Grand Marnier

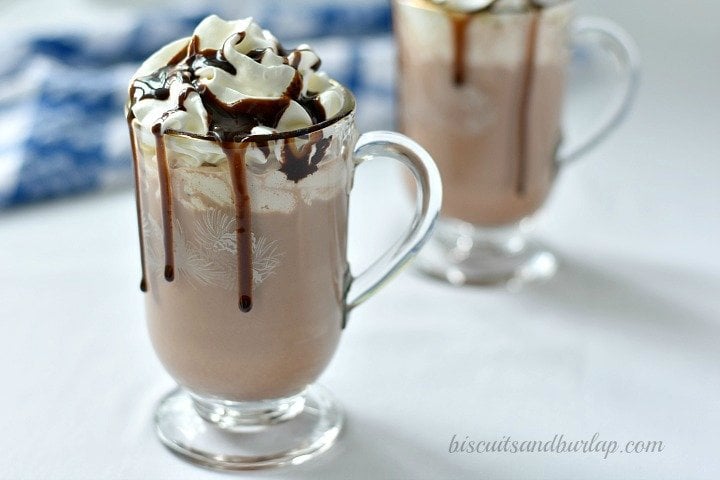
It’s cooling off out there and this spiked hot chocolate with bourbon and Grand Marnier is just what you need for your holiday get-togethers.

Hey there, UDH readers! We’re Pam and Sara from Biscuits & Burlap, popping in to give you a little food inspiration to go with your DIY projects. This is our third time contributing to the Ugly Duckling House and want to thank y’all for welcoming us with open arms. Sarah introduced us a couple months ago with a round up of our readers’ favorite recipes and we followed it up with a couple recipes just for y’all including a Limoncello Cucumber Cocktail and an Herbed Goat Cheese Crostini with Roasted Cherry Tomatoes.

With the cold months quickly closing in on us, what you need is a spiked hot chocolate to warm you up after trick-or-treating, during chilly tailgate parties, and at holiday gatherings.

spiked hot chocolate with bourbon and grand marnier

The key to a great hot chocolate is starting with whole milk. If you must lighten it up, you could substitute 2% but don’t go any lighter than that and please don’t use water. This is your chance to indulge!

Using brown sugar adds to the richness of this recipe and the booze? Well, booze just makes everything better.

spiked hot chocolate with bourbon and grand marnier

Start off with your milk in a saucepan and bring it to a boil. Remove it from the heat and stir in the cocoa, brown sugar and salt until dissolved. Last, stir in the bourbon and Grand Marnier and ladle into mugs. Top with whipped cream and garnish with mini chocolate chips, chocolate syrup, or a sprinkle of cocoa and orange zest and you have a yummy spiked hot chocolate!

Print

Spiked Hot Chocolate with Bourbon and Grand Marnier

This spiked hot chocolate with bourbon and Grand Marnier is just what you need for your fall and winter holiday get-togethers

  • Author:
  • Yield: 1 serving

Ingredients

  • 1 cup whole milk
  • 1 T cocoa powder
  • 1 T brown sugar
  • 1 dash salt
  • 1 oz bourbon
  • 1/2 oz Grand Marnier
  • whipped cream
  • mini chocolate chips, chocolate syrup or orange zest, for garnish (optional)

Instructions

  1. Bring milk to a boil in a medium saucepan.
  2. Remove from heat and stir in cocoa, brown sugar, and salt. Stir until dissolved.
  3. Add bourbon and Grand Marnier.
  4. Pour into mug and top with whipped cream and desired garnish.

The post Spiked Hot Chocolate with Bourbon and Grand Marnier appeared first on The Ugly Duckling House.

Website // Subscribe // Advertise // Twitter // Facebook // Google+


from The Ugly Duckling House https://www.uglyducklinghouse.com/spiked-hot-chocolate-bourbon-grand-marnier/

Tuesday 24 October 2017

Feeling the Fall – Charlie in the Country

This weekend was quite a fun one. Cooler temps, fresh air, and simply finding room to pause. And if you’re Charlie, it was an exhausting weekend, too — because my precious city pup saw what cows were for the first time, along with experiencing (for the first time) what life might be like if she had a huge, fenced-in property to patrol.

In short: she loved it. And she’s still sleeping it off as I type this.

Charlie is exhausted

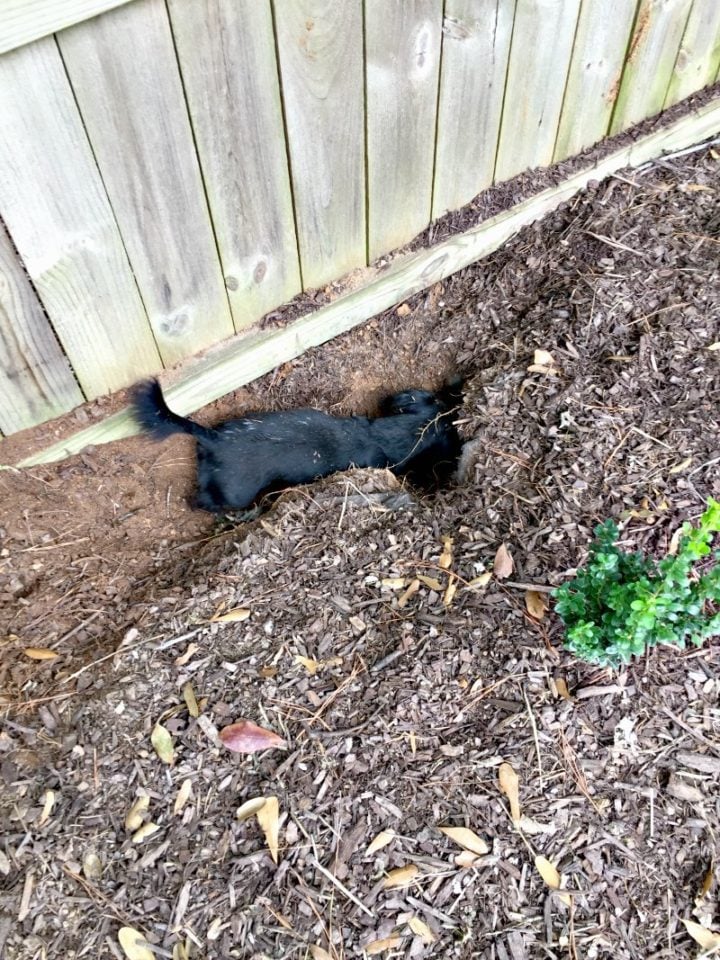
I haven’t shared much about “the bearded guy” on the blog (yet), but I’ve been dating a funny, nerdy, southern-twangy dude almost a year now. For the sake of not having to keep calling him “the bearded guy” as though he’s a stranger, I’ll just call him K. I think my favorite thing is that he pronounces Charlie’s name differently (“CHAH-lee”, no “r”). He’s also the owner of the little munchkin (Stella) you’ve been seeing in my social media feeds and will be a big help with the pub shed project (him, not the dog; she likes to dig holes in my garden beds to go after chipmunks, so she balances out the helpfulness of her owner somewhat).

Stella digging in hedge line

Over the weekend, we traveled to his hometown in Americus, Georgia to visit his parents. As with most trips like this, the intent had a bunch of different reasons, including helping them move some of their furniture (they’re building a house in Tennessee and needed to pack up the U-Haul), rehoming some of his old things (John Deere farm toys?), and spend a little time getting to know people I don’t know all that well yet (spoiler alert: they are incredibly charming). They had also recently chopped down a few trees, and I hoped to take some of it home for a few DIY projects as well as the indoor fireplace and outdoor fire pit (the cedar logs will smell sooooo good).

Americus Georgia Trees

Anyway, Charlie really enjoyed it. K and I have both tried to train her over the last year to walk better on and off a leash (as in, not simply booking it down the road the minute she’s loose), and it really seems to be paying off: my girl happily walked around with us around the entire property, came (mostly) when called, and spent a good part of the evening staring off into the distance at the strange mooing creatures she’d never seen before. She ran and sniffed and enjoyed so much of the property that she was already hinting at wanting to go inside for a nap before dinnertime (our excuse, “she’s an indoor type of dog”).

Charlie staring at cows

I think for Christmas, she’s going to get a dairy cow stuffed animal.

And since it’s almost time for Halloween: wanna see something scary?

scary old camper

This is K’s late grandfather’s old camper. For years, it’s been used as a workshop and for storage and hasn’t moved from this spot (we checked the plate: 1987, aka the year my sister was born). The wheels are flat; it’s rusty and grimy and kind of (okay, a lot) spooky. ðŸ˜±

But, according to him (not that I have a clue yet as I’ve not done any research), it’s from the 40s or 50s and worth something even in this state. So, he wants to restore it — and not, as most of my friends have joked to us so far, burn it.

sneak peek inside old Spartan camper

Well, I suppose I should say restore-ish: he also wants to trick it out with renewable tech and make it smart. Given that I’ve seen a few camper makeovers before (here and here come to mind thus far), I don’t think he’s entirely crazy… but this does also look like a thing where Jason Voorhees and Cousin Eddie might be nightmarish roommates (sooo many jokes, people). So… NOT THAT I’M AGREEING TO TAKE THIS ON YET… if you know of any great Instagram accounts or camper restoration blogs that you love to follow, feel free to send ’em my way to check out. And yes, I may make him wear a bathrobe and a trooper hat for the costume party we go to this weekend just because.

Also, one more update: I’ve caved. I’ve had a DNA test kit that I’ve held onto for a while (it was a gift from my sister a while back), and for the longest time, I haven’t really been all that concerned on what breed Charlie is. She’s a happy, lovable mutt, and since she was a puppy, I’ve always felt it was fun for people to guess rather than spoil their fun… the mystery is enough. But, K brought the kit downstairs the other night and finally convinced me — just for fun — to answer the question once and for all. So, she’s been swabbed and I’m sending off the kit this week. I’ll let you know her results in a few weeks when I get them back.

dna panel dog testing kit

How was your weekend?

P.S. Speaking of Halloween and costumes, I never got to share last year’s DIY costumes in full with ya, so I’m posting about that this week along with a simple and spooky-ish cross stitch pattern that you might enjoy (a bunch of you guys really seemed to like the last one, so I’ll post new plans every now and then when I make them). But fair warning, you’ll need to be an email subscriber for the library I’ll create for all of the downloads when that goes up. DIY build plans will also be in a similar plans library too, so if you’re interested in either one you should go ahead and sign up. Thanks! <3

The post Feeling the Fall – Charlie in the Country appeared first on The Ugly Duckling House.

Website // Subscribe // Advertise // Twitter // Facebook // Google+


from The Ugly Duckling House https://www.uglyducklinghouse.com/feeling-fall-charlie-country/

Friday 13 October 2017

Simple Square Napkin Rings

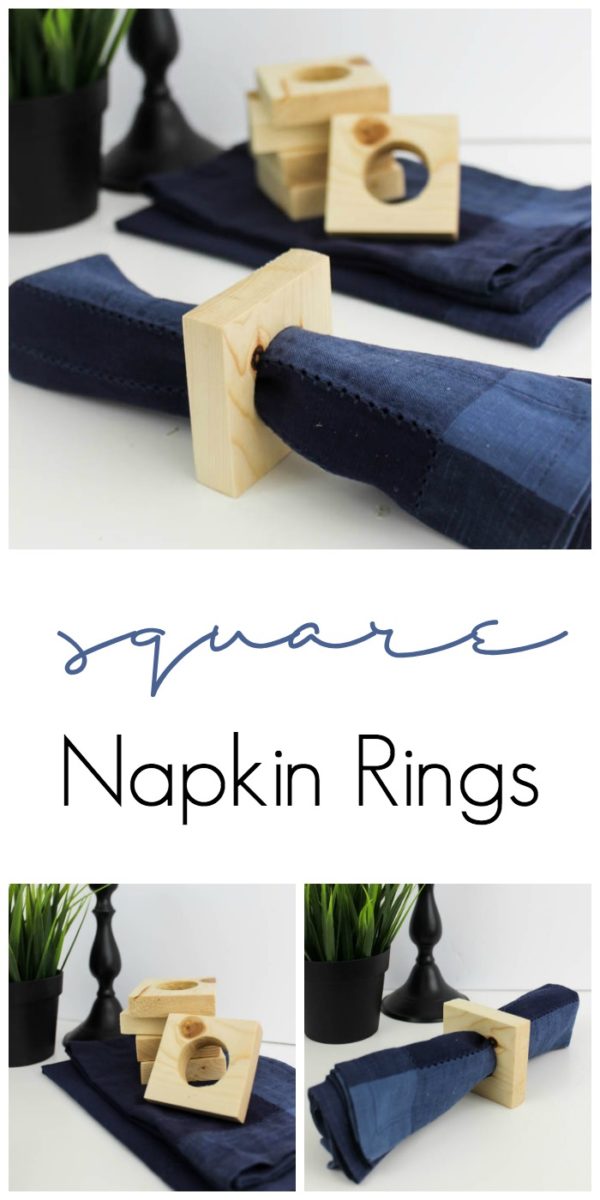
Hi UDH readers! My name is Lindi, and I blog at Love Create Celebrate. I’m so glad to join Sarah’s contributor team with my first project, these simple square napkin rings!A great way to use those scrap wood pieces! You can make these modern square napkins rings in no time at all! Perfect for your next dinner party!

If you’re like me, you probably have a giant pile of scrap wood pieces in your garage. Making something functional from a pile of odds and ends is the best. I recently used some 1×6 boards and had a ton of random scraps left over, so I’m using them for a few different projects and these simple square napkin rings is one of them!

A great way to use those scrap wood pieces! You can make these modern square napkins rings in no time at all! Perfect for your next dinner party!

This is about as easy as a DIY wood project gets!

What you need:

  • 1×6 scrap wood
  • Saw
  • Sander
  • 1 3/8″ Forstner bit
  • Drill press
  • Stain
  • Polycrylic or varathane

Instructions:

Start by cutting your wood scraps into 2.5″ x 2.5″ squares. You probably want a set of 6 or 8 of them. Once they are all cut, draw a line across the wood from opposite corners to find your centre point.

A great way to use those scrap wood pieces! You can make these modern square napkins rings in no time at all! Perfect for your next dinner party!

You want to use your foster bit to drill into the centre of your napkin ring. You can do this with a handheld drill, but it’s harder to be precise. I set my block up so that it was clamped in place with a piece of scrap wood underneath. The scrap wood underneath keep the wood on your napkin ring from splitting when you get all the way through.

A great way to use those scrap wood pieces! You can make these modern square napkins rings in no time at all! Perfect for your next dinner party!

Line up your bit so that they point is directly above the centre point you drew and drill all the way through.

A great way to use those scrap wood pieces! You can make these modern square napkins rings in no time at all! Perfect for your next dinner party!

To finish the napkin rings you need to sand them, stain them, and seal them. I used a stain called “natural” because I love the look of natural wood. It just accentuates the grain a bit.

A great way to use those scrap wood pieces! You can make these modern square napkins rings in no time at all! Perfect for your next dinner party!

What do you think? We you set your thanksgiving table with these napkin rings? I LOVE how they turned out!

A great way to use those scrap wood pieces! You can make these modern square napkins rings in no time at all! Perfect for your next dinner party! A great way to use those scrap wood pieces! You can make these modern square napkins rings in no time at all! Perfect for your next dinner party! A great way to use those scrap wood pieces! You can make these modern square napkins rings in no time at all! Perfect for your next dinner party!

The post Simple Square Napkin Rings appeared first on The Ugly Duckling House.

Website // Subscribe // Advertise // Twitter // Facebook // Google+


from The Ugly Duckling House https://www.uglyducklinghouse.com/simple-square-napkin-rings/

Thursday 12 October 2017

DIY Outdoor Drink Station for Backyard Entertaining

Introducing: Love Create Celebrate

Hey folks! So, you’ve already met Caroline (who shares my taste in decor) and Sara and Pam (incredibly talented foodies), but today, I’m going to introduce you to another amazing contributor for the UDH: Lindi, of Love Create Celebrate.

announcing lindi - love create celebrate

I have been working all weekend and the drier parts of this week to finish up the foundation of the pub shed and get a lengthy post up (plus answer those questions I know you’re raising an eyebrow at me about permits and such), so it seemed like no better time to show you guys some of Lindi’s fantastic projects and why (obviously) I asked her to contribute some easy DIY and woodworking ideas to the UDH. Take a look, for example, at the project that first led me to her blog — this modern bath caddy:

Woodworking + epoxy + ways to use up my scrap pile? Love it.

Lindi has gorgeous photography (the desire of every DIY/interior blogger), but what I also like about her blog is that she has lots of real life thrown in. Guys, blogging is still a pretty new industry as far as jobs go, and it gets more challenging to keep up with changes in social media rules, online analytics, all of those “algorithms” you hear about, etc. almost daily (the geeky stuff, but often the stuff that can make or break whether or not new readers find your site). And with that comes a lot of pressure to take perfect shots and “sharable” content while still having a life and walking the dog and conference calls and all that behind-the-scenes boring madness. It’s frankly a lot of BS, and I love blogs who still have the guts to show me that they’re human too. For example, this gorgeous DIY bench Lindi made is enviously styled and simple, but see the floor? THERE’S SAWDUST ON IT. Trying to achieve that “perfect” shot when uploading photos to please the social media gods requires way too much floor sweeping. I CAN SOOOO RELATE to the realness of this (while still adding “build an entryway bench” to my to-do list).

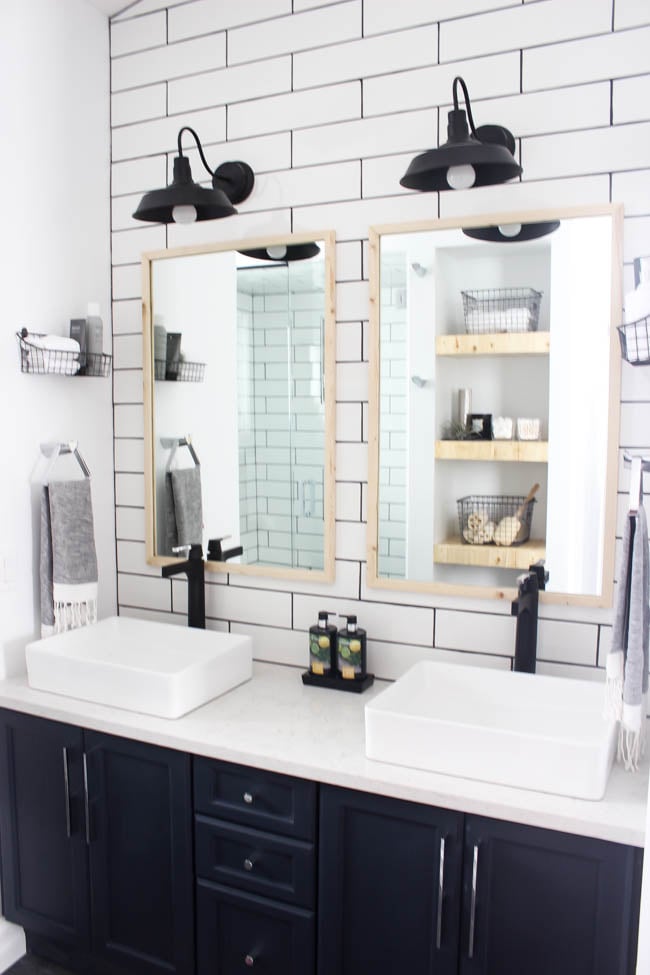
But, like I said, she’s also got some great tips for build projects, like cutting glass for these simple bathroom mirrors (I recognized the faucet line she used as the same style I used in the master bath shower, ha).

Normally, DIY signs aren’t something I blog much about (take pieces of wood, glue or nail them together as a group and paint them, done). But this DIY sign is another project that got my attention because it’s a great idea for keeping holiday decor to a minimum. One one side, it’s fall decor; on the other, it’s ready for Christmas (so instead of storing two things, she just walks into the room the day after Thanksgiving and flips it around… smart idea).

And I know it’s a bit early to start thinking about Christmas, but her mini deer ornament project from last year is pretty great, too. Lap crafts for the holidays are the best!

So, please give a warm welcome to Lindi, check out her blog, and come back tomorrow for her first project as a DIY contributor for the UDH (hint hint below). I think you’ll like it!

A great way to use those scrap wood pieces! You can make these modern square napkins rings in no time at all! Perfect for your next dinner party!

The post Introducing: Love Create Celebrate appeared first on The Ugly Duckling House.

Website // Subscribe // Advertise // Twitter // Facebook // Google+


from The Ugly Duckling House https://www.uglyducklinghouse.com/introducing-love-create-celebrate/

Friday 6 October 2017

How to Seamlessly Transition Crown Molding Where Tile Meets Wall

Taking tile all the way up to the ceiling in the master bathroom had an unanticipated puzzle: what on earth do I do with the crown molding as it transitions from the tiled shower to the wall? The answer was simple, but I’ll admit — I had to think on it…


how to seamlessly transition crown molding over tile and drywall

**thinking to myself** “How does a person paint stairs, exactly? Do you paint them and wait for it to dry? Good god, Sarah, that’s probably not it and you should never tell people you don’t know how to do basic things.”

Sometimes, in all honesty, there are the little things that I have to think about for a minute — like the time I had to load a giant boxspring by myself onto a flatbed cart or realized that some drills use chuck keys — and then all of a sudden, it’s SO CLEAR what the solution is, I feel like an idiot for never realizing it in the first place. But then someone asks me the same question and I admire them for being brave enough to admit they didn’t know.

(*The stair solution, by the way, is here… and the boxspring had to be loaded onto its side and at an angle to keep from tipping or bowing over the edge of the cart. I have my moments, folks.)

Anyway, today I wanted to cover a topic that I think has stumped more than one of us out there in internetland: when you tile a bathroom all the way up to the ceiling and plan to add crown, you suddenly have to figure out what to do once it’s at the ceiling.

new shower head and full shower with edges finished

If you were to search for this problem online, you would find people have tried every single one of the above for solutions to this same bathroom problem. Each had a few upsides, but some of them looked like they could wind up very frustrating to cut neatly (and I’d maybe go through a lot of pieces of crown before getting it right). But I found a different option that worked really well, and it was much simpler than complex cuts around the tile edge and looks (in my opinion) more professional than trying to stop the crown anywhere along the wall or tile.

The answer was in baseboard molding. Here’s how:

First, I cut a small scrap piece of both baseboard and the crown molding I planned to use (just because it would be easier to make marks with a lightweight piece of scrap in one hand rather than try to lift it all just to get a visual). I flipped the piece of scrap baseboard upside down so that the routed “fancy” top edge was actually on the bottom.

This allowed me to get an idea of how much space to leave right at the ceiling so that the baseboard would stick out juuuuust enough below the crown once installed (about 1/2″). This is a fun little trick for getting crown to look a little beefier (which it definitely does), but it also solved my problem of getting the entire wall to sit all at the same depth.

upside down baseboard next to tiled shower

And the rest was easy as pancakes.* With the wall and tile now (basically) the same thickness where I needed to attach the crown, I nailed everything in place with my pneumatic, save for a few swear words whenever I couldn’t get the angles right (I eventually did, and Sandra’s templates for crown molding are oh-so-helpful). I took a few quick shots in between attaching pieces so you can see what I mean.

baseboard with crown on top

I almost wound up taking a Dremel to shape out the vertical pencil tile where the edge of the subway meets the wall (because it was just a tiny bit thicker than the subway tile and baseboard), but the crown was flexible enough to fit right over it without trouble and the resulting gap filled easily with caulk.

sneak peek of new crown moulding and ceiling details

seamless transition from shower tile to drywall with crown molding

And there you have it: a simple solution to an otherwise puzzling problem. It doesn’t hurt that this fix also makes the room look even more luxurious with a little thicker crown. :)

shower tile and crown molding

Have you ever found a simple solution to what you thought was going to be fussy at first? Do tell — I may learn something for another project!


*I’m writing this during dinnertime and I’m craving pancakes.

P.S. Want to see more about the bathroom makeover? You can look here to get caught up on the series but here’s the big shower makeover!

master bathroom white and green shower makeover

The post How to Seamlessly Transition Crown Molding Where Tile Meets Wall appeared first on The Ugly Duckling House.

Website // Subscribe // Advertise // Twitter // Facebook // Google+


from The Ugly Duckling House https://www.uglyducklinghouse.com/how-to-seamlessly-transition-crown-molding-where-tile-meets-wall/